Installing aiFetchly on Windows, Mac, and Linux: Setup Guide
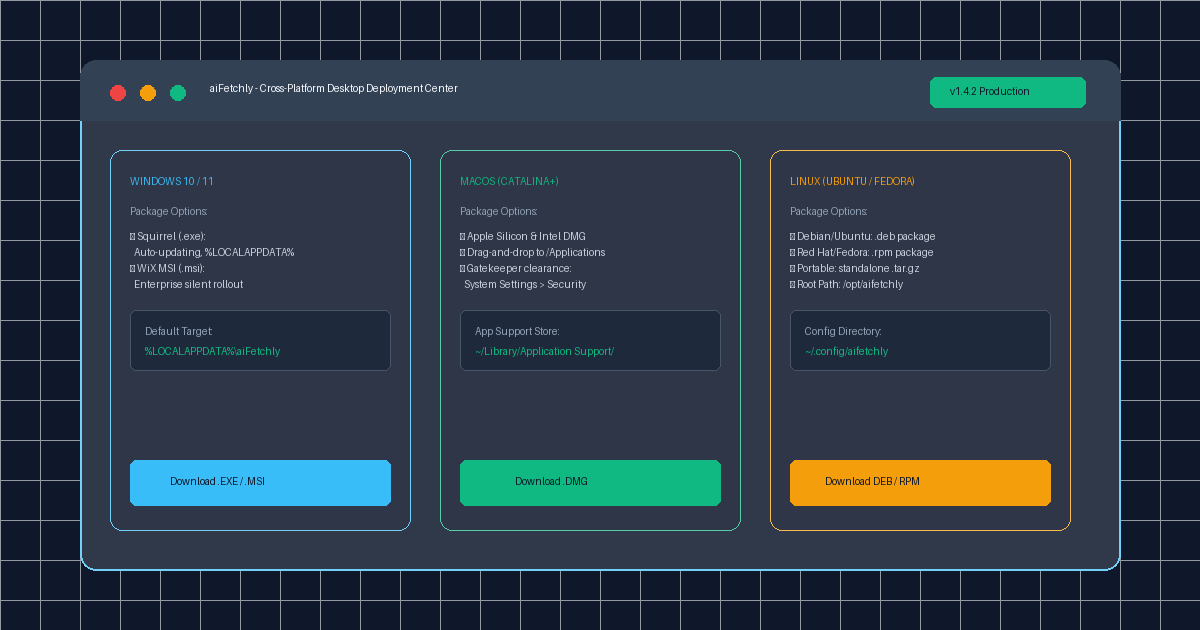
Local-First Desktop AI Across Operating Systems
Modern engineering teams increasingly reject browser-hosted AI tools in favor of native desktop execution. Running agentic workflows locally ensures zero cloud telemetry, direct access to developer tooling via Model Context Protocol (MCP), and unconstrained background task scheduling.
AI Fetchly is built as a cross-platform desktop application powered by Electron. It delivers a uniform data harvesting and agentic automation experience across Windows, macOS, and Linux, storing all vector databases and proxy credentials securely on your local storage.
Here is the complete step-by-step guide to installing and configuring aiFetchly on your workstation.
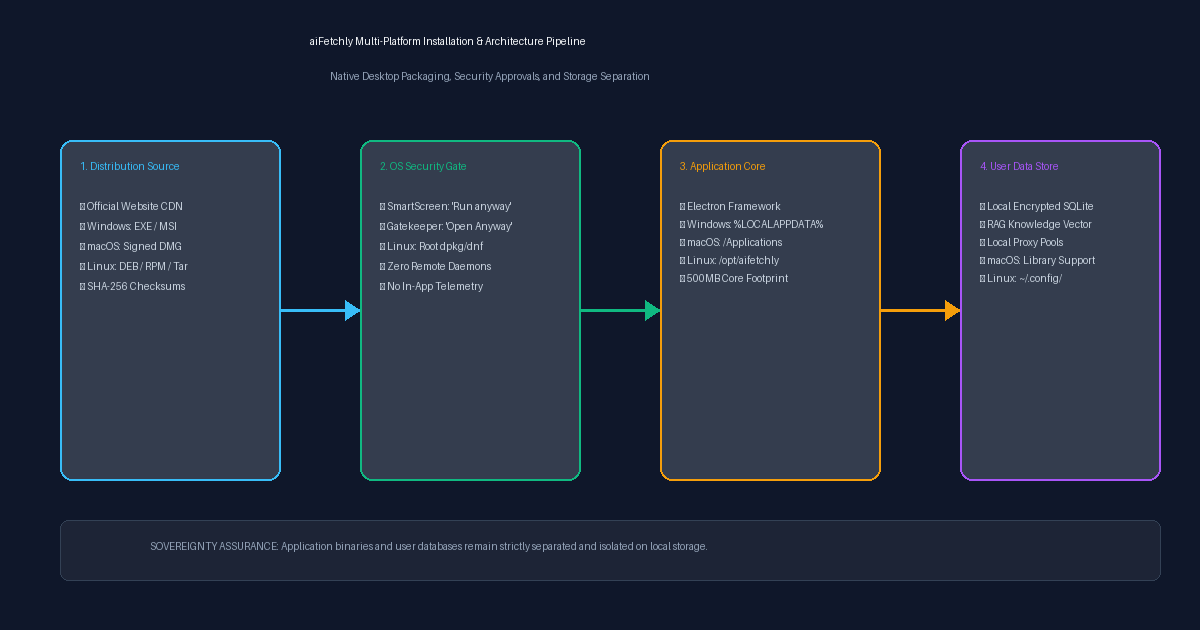
System Requirements and Hardware Baseline
Before deploying aiFetchly, verify your workstation meets the minimum baseline:
- RAM: 4 GB minimum (8 GB recommended for concurrent search and local embedding models).
- Disk Storage: 500 MB for core application binaries + additional space for harvested leads and SQLite vector indexes.
- Operating Systems: Windows 10/11, macOS 10.15 (Catalina) or later, Ubuntu 20.04+, Debian 11+, or Fedora 35+.
Step-by-Step Installation: Windows
aiFetchly offers two distinct Windows installers tailored for individual workstations and managed corporate fleets:
Option 1: Squirrel Installer (.exe) — Recommended
The modern installer includes seamless background auto-updating:
- Download
aiFetchly-Setup-x.x.x.exefrom the official website. - Double-click the installer. If prompted by Windows SmartScreen, click More info followed by Run anyway.
- The setup wizard deploys the application directly to
%LOCALAPPDATA%\aiFetchly. Standard installations require zero administrator privileges.
Option 2: WiX Enterprise Installer (.msi)
For managed IT rollouts and group policy deployments:
- Download
aiFetchly-x.x.x.msi. - Run the MSI wizard or execute silent enterprise installation via
msiexec /i aiFetchly-x.x.x.msi /qn. - Choose per-machine (
Program Files) or per-user provisioning.
Step-by-Step Installation: macOS
- Download the signed
aiFetchly-x.x.x.dmgdisk image. - Double-click to mount the DMG, then drag the aiFetchly icon into your
/Applicationsdirectory. - Gatekeeper Clearance: On first launch, macOS may present an unidentified developer prompt. Open System Settings > Security & Privacy > General and click Open Anyway (or right-click the app in Finder and choose Open).
- User preferences and SQLite databases are safely isolated in
~/Library/Application Support/aiFetchly.
Step-by-Step Installation: Linux
aiFetchly distributes native packages for major Linux package ecosystems:
Debian & Ubuntu (.deb)
sudo dpkg -i aifetchly_x.x.x_amd64.deb
sudo apt-get install -f # Resolves shared dependencies Fedora & Red Hat (.rpm)
sudo dnf install aifetchly-x.x.x.x86_64.rpm The application installs to /opt/aifetchly with user configuration preserved in ~/.config/aifetchly.
Start Building Sovereign Desktop Workflows
Once installed, aiFetchly launches into its unified dashboard with immediate access to Multi-Engine Search, Knowledge Library RAG, and AI Chat V2.
To begin configuring local proxies and custom LLM providers, explore the AI Fetchly Docs.
Visual Generation Prompts
Hero Image Prompt:Modern dark-mode application window of the aiFetchly Cross-Platform Desktop Deployment Center, featuring side-by-side OS install cards for Windows (Squirrel/MSI), macOS (DMG), and Linux (DEB/RPM), showcasing file paths and green ‘Production Ready’ badges, sleek isometric 3D perspective, cyan and emerald glow.Body Image Prompt:High-resolution technical pipeline flowchart illustrating the aiFetchly cross-platform deployment architecture: official signed binary distribution, OS security clearance gates (SmartScreen, Gatekeeper, dpkg/dnf), Electron application core placement (/opt, Program Files, Applications), and sovereign persistent user data isolation in local SQLite, clean vector schematic style on dark slate background.